|
|
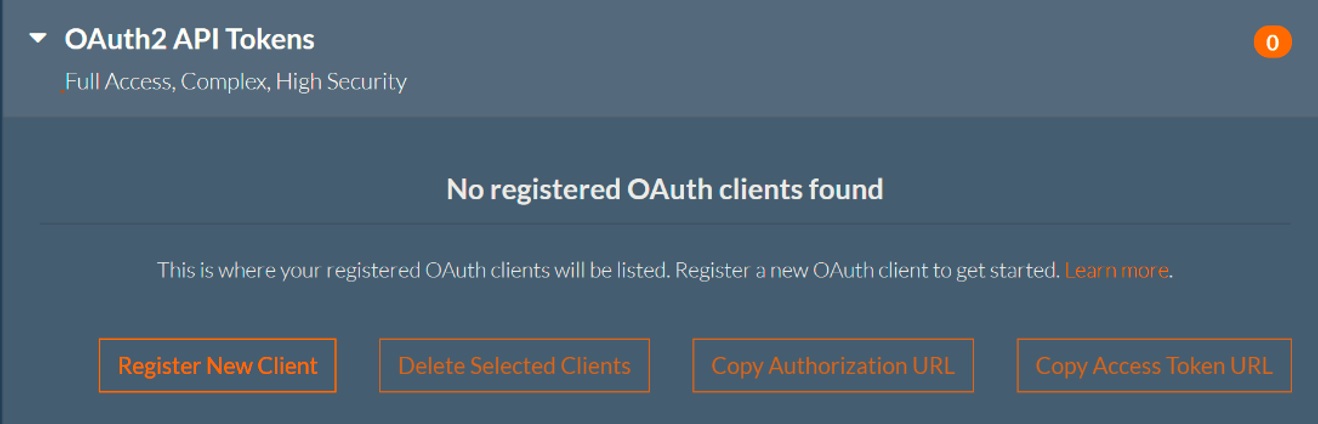
OAuth2 API Tokens
Click the arrow beside OAuth2 API Tokens to view your OAuth2 tokens.
OAuth 2 is a well-documented and widely used method for securing web accessible resources. Currently, the RASON service implements the OAuth 2
Authorization Code Grant flow with Proof Key Code Exchange (PKCE). This section provides documentation and guidance on how to use the OAuth 2
Authorization Code Grant Flow with PKCE to secure your RASON resources.
- Click Register New Client and follow the directions below to create an OAuth2 API Token.
- Click Delete Selected Clients to delete the desired clients
- Click Copy Authorization URL to copy the Authorization URL to the clipboard
- Click Copy Access Token URL to copy the Access Token URL to the clipboard
Creating OAuth2 API Tokens
Overview
This section focuses on the documentation of rason.com and rason.net domains. Click the appropriate link for more information
on OAuth 2 and PKCE. In this
scenario, rason.com is the authorization server and rason.net is the resource server. Users wishing to employ OAuth to securely
access their resources will need to:
- Register a client.
- Grant authorization to the registered client via the authorization server, rason.com.
- Exchange the authorization code from step 2 for an access token.
- Exchange refresh token for access token
- Use the access token from step 3 to interact with the resource server, rason.net.
Client Registration
To review your registered clients, or register a new client:
- Navigate to https://rason.com and log in.
- Click the ‘My Account’ link in the upper right corner or simply navigate to here.
- Click API Tokens, then OAuth2 API Tokens.
- Any previously registered clients will be listed here.
- Click ‘Register New Client’ to launch the new client registration dialog
- Fill out the client registration form
- Type: (Required) Select either ‘public’ or ‘confidential’ depending on the type of client. Click
here for an explanation of those types.
However, please note that rason.com does not issue client secrets, even in the case of a confidential client.
- Scope: (Required) Select either ‘full’ or ‘runtime’. This defines what the client can do with the resources.
A scope of ‘full’ will allow the client to create, update, read and delete all resources. A scope of ‘runtime’
only allows model execution and access to model results. Clients with this scope will not be able to create, modify
or delete resources. Nor will this allow the client to read the model itself.
- Name: (Required) This is the name of the registered client.
- Redirect URI: (Required) This is the URI that will be redirected to after submitting the authorization form.
- Description: (Optional) Enter a description of the client.
- Access token duration in minutes: This will define the "time to live" for all access tokens issued to this client.
Depending on the needs of the client , the user may wish to have longer or shorter access token duration. The security
trade off here is that longer-lived access token requires less human interaction (in the form of authorization), but a
larger security exposure if the token is compromised. A shorter duration token has a smaller security exposure window,
but may require more frequent authorization.
- Issue refresh tokens?: Check the box if you want the server to issue refresh tokens with access tokens. Note that
refresh tokens can be exchanged for access tokens and any given refresh token can be used only once. If checked, a new
refresh token will be issued with each access token issued. If you do not want refresh tokens to be issued, leave the box unchecked.
- Refresh token duration in minutes: If you checked the box to issue refresh tokens, enter the "time to live" for the refresh token.
This defines the interval of time when a refresh token can be exchanged for an access token, beginning when the refresh token was
first issued. Depending on your needs a good practice is to have relatively short access token durations and relatively long refresh
token duration.
- Click the ‘Register Client’ button to register the client.
Once registered, the client will be issued an Identifier by rason.com. This identifier is required along with the client redirect URI and scope to complete the process.
Grant Authorization to Registered Client
In this step, users will authorize their clients at rason.com using PKCE.
- Generate a suitable PKCE challenge value. Click here for details on
generating a PKCE challenge and value pair. For testing purposes, use a PKCE generator available on the web, such as
this one. Note that the method used here must be S256.
- Navigate to the authorization endpoint: "https://rason.com/Auth/authorize" with the following query parameters:
- client_id: (Required) Use the client ID issued to the client by rason.com when the client was registered.
- redirect_uri: (Required) Use the redirect URI for the registered client identified in ‘a’ above.
- response_type: (Required) Must be ‘code’ (no quotes).
- code_challenge: (Required) The PKCE code challenge generated in step 1 above.
- code_challenge_method: (Required) Must be ‘S256’ (no quotes).
- scope: (Optional) If omitted, will default to the scope of the registered client. If specified, and the scope of the registered
client is more restrictive, then the scope of the registered client will be used. Otherwise, this scope will be used.
- state: (Optional) This is additional information that will be passed through to the redirect URI.
- Example authorization request
- "https://rason.com/Auth/authorize?client_id=abcd1234&redirect_uri=https://mydomain.com/clientauthorization&response_type=code
&code_challenge=IDqjKbnDNCEISSCYiTxREAYhvp1grPcWuQOoupoV3_o&code_challenge_method=S256&scope=runtime&state=userdata"
- Authorize the client by:
- Entering the user's rason.com credentials.
- Checking the ‘Allow Client Access’ checkbox.
- Clicking the ‘Authorize’ button.
- At this point, users will be redirected to the registered clients redirect URI with the following query parameters:
- code: This is the authorization code, not the access token. This authorization code must be exchanged for the access token.
After ten minutes, this code will expire and can no longer be used.
- state: Any state information specified in step 2, part 7, above.
Exchange Authorization Code for Access Token
Once the authorization code has been received, it must be exchanged for an access token. Recall that the authorization code is good
for 10 minutes from the time it was issued, so the following steps must be performed before the code expires. Note that the authorization
code will be URI encoded and will need to be decoded in order to be used further.
To exchange the authorization code for an access token:
- POST the following values to "https://rason.com/Auth/Token" using the "application/x-www-form-urlencoded" format:
- grant_type: (Required) Value MUST be set to "authorization_code" (without quotes).
- code: (Required) The authorization code received from the authorization request as documented above.
- redirect_uri: (Required) Must be identical to the registered redirect_uri of the registered client.
- client_id: (Required) The ID assigned when the client was registered, as documented in the ‘client registration’ section.
- code_verifier: (Required) The value used to generate the code_challenge in the authorization request, as noted in step 1 under
‘Grant Authorization to Registered Client’.
- Upon successful processing of the request, rason.com will issue a JSON object response with the following properties:
- access_token: This is the access token allowing the bearer to access resources at rason.net, the resource server.
- token_type: All tokens are of type “bearer”.
- expires_in: The interval of time, in seconds from now, for which the token is valid. This number is simply the Access token
duration in minutes specified at client registration expressed in seconds rather than minutes. Once the time interval has passed,
the token is no longer valid.
- scope: This is scope of the access token, either ‘full’ or ‘runtime’.
- refresh_token: If the Issue refresh tokens? checkbox was selected when the client was registered, this will have the refresh token,
which can be exchanged for an access token and another refresh token.
Exchange Refresh Token for Access Token
If the client was configured to issue refresh tokens, then you can exchange a refresh token for an access token as long as the refresh token has not expired. Perform the following steps to exchange a refresh token for an access token.
- 1. POST the following values to "https://rason.com/Auth/Token" using the "application/x-www-form-urlencoded" format:
- grant_type: (Required) Value MUST be set to "refresh_token" (without quotes)
- refresh_token: (Required) the refresh token received from a prior access token request.
- client_id: (Required) The ID assigned when the client was registered, as documented in the ‘client registration’ section.
- redirect_uri: (Required) Must be identical to the redirect_uri of the registered client.
- Upon successful processing of the request, rason.com will issue a JSON object response with the following properties:
- access_token: This is the access token allowing the bearer to access resources at rason.net, the resource server.
- token_type: All tokens are of type “bearer”
- expires_in: The interval of time, in seconds from now, for which the token is valid. This number is simply the Access token
duration in minutes specified at client registration expressed in seconds rather than minutes. Once the time interval has passed,
the token is no longer valid.
- scope: This is scope of the access token, either ‘full’ or ‘runtime’
- refresh_token: A new refresh token, which can be exchanged for an access token and another refresh token.
Use Access Token to Interact with Resource Server (rason.net)
Once you have the access token, include it as a bearer token in the Authorization header for all requests to the rason.net resource server.
|